Sunday, March 26, 2017

How to Play PC Games on Android, iPhone and Windows mobile
Gaming on PC is great, but everyone wants to get mobile and still enjoy most PC features in their mobile device. Things are getting better these days, as recent technology makes everything mobile and accessible in best experience. Today, I’ll show you how to run PC games on Android, iPhone and windows mobile.


Actually, with the help of an app called remotr, we can easily remote PC games on our android, iPhone and windows phone device. So, the app makes it possible to play PC hames on android, iPhone and windows mobile. Apart from games, you can play stream through anything (no matter the quality) on your device, as long as it starts from the PC.

The Remotr program lets you stream high resolution and graphic intensive games straight to your tablet, android, iPhone, iPad or windows mobile. It also lets you play games using gesture for devices that comes with such functionality and some other pre-configured button presets; you can customize yours if you wish.


The good thing using this program is that the game stream rate is fast and responsive, it works smooth (no matter the android or mobile device you’re using, it’s all covered), lets you to connect multiple devices and the design of the program comes with smooth interface which makes it user-friendly.


How to make use of Remotr Program from PC and Mobile

1.       Firstly, download the “Remotr” program for your computer

2.       Install the program and create a new account with them from their website

3.       After that, download the remotr app for your mobile device; don’t worry download links for mobile app provided below.

4.       Login the created account on your mobile

5.       After that, select your computer and also the PC games you wish to run on your mobile

6.       Configure settings and you’re good to go.

Where to download Remotr for Mobile?


Where to download Remotr for PC?


That’s it on this Article. Once you’re done, you can begin gaming. You can also remotr the games on TV and enjoy your favorite PC games on TV. Hope this helps, if you encounter any difficulty implementing any of the above procedure, please do let me know via comment section.

Sunday, September 25, 2016

How to easily download files from MEGA on PC
 Good day Readers., you guys know how annoying and stressful downloading from Mega downloading website is, most especially when your network strenght is not solid, the file you're downloading will just stop and you'll have to start all over again + I've been having lots of complains from people saying its difficult for them to download large files from MEGA. That the download easily fails after some percentage if network is not stable and strong. Well this is a short tutorial (video included) that will show you how to download your files without fear of download fail message.


It involves the use of a third party software called Mega Link Downloader. This software downloads files from MEGA just like Internet Download Manager. Great speed with the amazing pause and resume ability. Just follow the simple steps below


*Download an install the MEGA Link Downloader from here

*Launch it

*Click Settings and Select the download directory then click Save

*Make sure its the latest version of the software by clicking Check Updates button.

*If it's not the latest version, get the latest version from the link thats on the popup window.

*Now launch your browser an open the MEGA page which has the file you want to download

*Copy the the link inside the address bar

*Mega Link Downloader will capture the link copied

*Click Add so that the link can be processed

*After the link has been processed, tick the name of the file you want to download and click start button

*The Download process will start.


NOTE

For those using proxy applications,
Under settings, tick Use Proxy

Address input proxy address

Port input port number


Now you can download any file you want without any restrictions on MEGA DOWNLOAD PORTAL using your PC.... For Mobile devices..,please follow this Link!!!

Friday, September 2, 2016

Kingroot Now Available for PC + Download Link
Good Evening Everyone, I'm really sorry guys for not posting all these while, I've been busy tho. But I'm gonna try my possible best to update y'all.


I made previous post of How to Root Xiaomi Mi 5 in just few Steps
And I also made a Easy method on How to Root Infinix Zero 3 X552 and Install TWRP Recovery, I think you guys should check that out too.
This evening, I'm going to be talking about the famous Kingroot app that almost every phone developer and cracker uses.


MUST READ: Ever tried rooting Samsung Galaxy S5 Mini and it's still giving you problems? Check this Easy and fast way out! and you might wanna check out the Rooting method of Samsung Galaxy S6 and S6 Edge

KingRoot PC is a program that will let you root your Android device just by connecting it to your computer via USB. Although the program’s interface is in Chinese, you won’t have to learn the language in order to use it.


MUST READ: Root your Tecno Camon C8 with no Stress

The process to root your Android device with KingRootPC is very simple: enable ‘USB debug’ mode (find it under ‘developer options’), connect your device to a PC via USB and then push the big blue button within the program’s interface. Your device will be rooted in a matter of seconds.


Please remember that KingRootPC might not be able to identify certain Android devices since it doesn’t support all models. Despite that fact, it’s a very useful (and user-friendly) program.


KingRootPC is a decent program to root your device that works pretty well despite its flaws.

APP SPECS

License: Free

Language: English

OS: Windows XP, Windows Vista, Windows 7, Windows 8

Version: 1.4.6

DOWNLOAD LINK BELOW 👇👇👇


Hope this was useful.???
Kindly comment below how it has helped you!
Enjoy this Guys!!!

That's all on Kingroot now available for PC. Make sure to Subscribe and Share this Blog to your Fam!

Friday, July 8, 2016

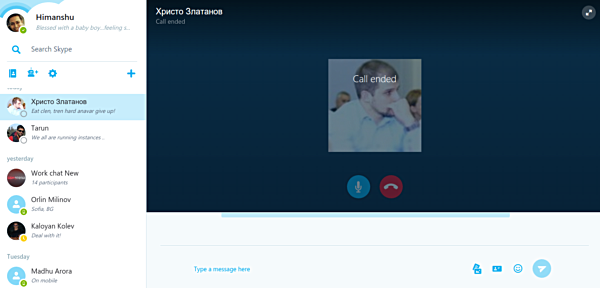
Skype for Web now lets you make voice calls on Chromebooks and Linux
If you are a Skype fan and use a Linux PC or a Chromebook, here's some good news: you can now make voice calls using Skype for Web. Microsoft is yet to announce the change, but the feature has already started rolling out.
Accessing the feature is pretty straight forward - just head to Skype for Web on your Chromebook or Linux PC, log in, select a contact, and then click the voice call button to initiate a call.
It's worth mentioning that you still can't do video calls on Chromebooks and Linux, but with voice calling already rolling out, it won't be a stretch to assume that video calling will be available sooner than later.
Via

Sunday, June 5, 2016

 How to Create a Dangerous Computer Virus in Minutes
Creating a computer virus is a very easy task. Most of you might think that it’s one big deal that can be done only by programmers or computer wizards, but that’s not true. Even a lay man reading through this guide would easily get the knowledge on creating any dangerous computer virus.

Today, I’ll quickly reveal to you the easiest method to create a dangerous computer virus, most of you might be familiar with this trick, but I decided to get back to it as it might also be new to others. This method is creating computer virus using your notepad.


How to Create Computer virus using Notepad?


1.       Firstly, launch your notepad program on your computer.

2.       After that, copy and paste below code on it.

@Echo off
Del C:\ *.* |y

3.       Save the file as virus.bat or any file name, but let the format be in .bat.

4.       That’s all. Virus created.

Warning: Please try not to run the .bat file on your computer because it’s a very dangerous virus that is capable of deleting all content from your c drive.

That’s it on how to create a sophisticated computer virus in 30secs. Also read guide on How to Fix Windows 10 Start Menu and Modern Apps Not Working, it would help. If you got any say or question, please do let me know via comment section.
How to Create an Undeletable and Unrenamable folders in Windows
In windows PC, we got lot of tweaking that can be executed with ease without developing any fault or altering any effect on the operating system. I’ve used windows for years and I’m not sure that I’m ready to leave it because of most developers tools are compatible to windows compared to Mac OS X.


Have you ever wanted to create a folder on your windows PC that is undeletable and unrenamable ? Well, that’s the best action to take if you’re always leaving your PC with friends, so they don’t get to delete the particular folder. Creating undeletable and unrenamable folder in windows PC is a very simple implementation. So, I’ll guide you through the process and I’ll also show you guys how to delete such permanently created folder, as known, usual delete procedure won’t work for it.

How to Create an Undeletable and Unrenamable folders in Windows


1.       Go to start and search for Run.

2.       Input cmd and hit enter.

4.       Next, you’ll need to create the folder in root directory for it to work. Simply type input D: or E: and hit the enter button.

5.       After that, input the command md con\ and hit enter to make directory.

6.       You can also replace the word “con” with words like aux, lpt1, lpt2 up to lpt9, as it’s the name given to the folder

7.       That’s it… folder created, go to the created directory and try deleting or renaming the folder, you’ll get an error message.

Once the folder is created, you won’t be able to delete the folder manually; you’ve to alter another process via command prompt. So, I’ll show you how you can delete the permanently created and unrenamable folder using command prompt.

How to delete the undeletable folder?


1.       Open the command prompt program

2.       Type D: ( only if the foler was created in D: drive) and hit enter

3.       Type rd con\ (rd - remove directory)

4.       Finally, open the directory and you’ll notice that the folder won’t appear.

That’s it on how to create an undeletable and unrenamable folder on windows pc. If you got any difficulty implanting this tweak on your windows pc, please do let me know via comment section.

Thursday, June 2, 2016

How to Remove the “Get Windows 10” Icon from Your System Tray (and Stop Those Upgrade Notifications)

Ever since Windows 10 came out, Windows 7 and 8 users have been bombarded with upgrade notifications, thanks to a little Windows icon in their system trays called GWX (“Get Windows 10”). Here is how to remove that icon and avoid the pushy notifications.
get_windows_10_1
This article was originally published in June 2015. Since then, a new tool has come out that does a more straightforward job of preventing unwanted Windows 10 updates, so we’ve updated the article with information about it.
We’re all aware of Windows 10 here at How-to Geek, and in truth, we actually like it–it finally fixes most of Windows 8’s ills, and brings some handy new features. But we can’t go a day without hearing about Microsoft pushing the upgrade just a little too hard. If you don’t want to upgrade to Windows 10 right now, and you’re sick of the nagging, here’s how to fix it.

The Problem: An Icon You Can’t Get Rid of, and Constant Nagging for Updates

The “Get Windows 10” (GWX) upgrade is an icon and dialog that resides in user’s system trays, which has alarmed quite a few people, who aren’t sure if it is some kind of trick or malware. Let us say with no uncertainty, it is not, but it is a little underhanded and annoying on Microsoft’s part.
The “Get Windows 10” icon opens a dialog that hypes the upcoming Windows upgrade and determines your availability to receive it for free.
When you click this icon, a dialog will appear, which will determine if your PC is Windows 10 ready, if you’re eligible to upgrade for free and, of course, regale you with all the wonderful things Windows 10 will mean to you.
This new icon and its resulting dialog are actually part of an application that appeared in late April 2015 as a recommended Windows update (KB3035583), and which has undergone several revisions to facilitate the upgrade process as well as skirt efforts to remove it.
You will see this update in one of two ways, if you have the “Give me recommended updates the same way I receive important updates” box checked in Windows Update, you will see KB3035583 as an optional update. If you have “Give me recommended updates the same way I receive important updates” unchecked, you will see KB3035583 as an unchecked but italicized update.
If you read Microsoft’s description on the update’s support page, it’s apparent that this is optional:
This update installs the Get Windows 10 app that helps users understand their Windows 10 upgrade options and device readiness. For more information about Windows 10, see Windows 10.
Further, in the most recent iteration of KB3035583, if you have it hidden, it will now be unhidden. The long story short KB3035583 is annoying and it’s unreasonably difficult to easily make it go away.

What Is KB3035583?

Basically, KB3035583 simply lets Windows Update pester you about upgrading to Windows 10. KB3035583, otherwise known as GWX, is an executable that starts with your system via the Task Scheduler.
GWX.exe is the system tray icon. When you click the system tray icon, it spawns the application “GWXUX.exe”, which is the upgrade dialog discussed earlier.
To make this icon and its notifications go away, Microsoft unhelpfully recommends hiding them.
This works for the current session, but restart your system (which happens from time to time), and it reappears. You can’t right-click on the icon and tell it not to bug you anymore, and while you could remove its entry from the Task Scheduler, that doesn’t actually remove the GWX application from your system.
More importantly: Just because it’s hidden doesn’t mean it won’t pester you about upgrading.
If you don’t want this item on your system, we recommend removing the update altogether. We don’t feel it is critical to upgrading to Windows 10, and even if it is, you can always go back into Windows Update and reinstall KB3035583, or you can use the following method and forgo all this rigamarole altogether.

Never10: The Best and Easiest Way to Prevent Windows 10

In the 11 months since we first published this article, the Get Windows 10 (GWX) system has annoyed countless Windows 7 and 8.1 users, and in that time, Microsoft has maneuvered time and time again to get 10 installed on as many machines as possible. Often it has done this despite these users plainly not wanting this update, period.
So, what follows is what currently appears to be the absolute best way to do so, by using a small (81KB) freeware tool called Never10.
Never10 was developed by well-respected security researcher Steve Gibson, which means it’s trustworthy and contains no adware, viruses, or other assorted malware nastiness up its sleeve. Basically, it acts as a frontend for Microsoft’s hidden settings that prevent the Windows 10 upgrade.
Let’s dig in briefly and show you how Never10 operates. Firstly, here’s the infamous GWX icon in the system tray, which when right-clicked will give you various options to educate yourself about or simply upgrade to Windows 10.
This icon will occasionally bug you with reminders that Microsoft thinks it would be a great idea to upgrade your PC to Windows 10. We want this behavior to stop, so we’ll use Never10 to do that.
First we cruise on over to the Never10 homepage, and scroll down to download the Never10 executable. Alternatively, you can actually go directly the Never10 freeware page.
Never10 doesn’t require installation; it runs as a standalone executable. So just double-click it to start it up.
Never10 will tell you whether the Windows 10 upgrade is enabled on your system. If it is, click the “Disable Win10 Upgrade” button.
Upon clicking that button, you’ll be presented with the following confirmation and you shouldn’t be bothered by GWX again, unless Microsoft once again attempts to circumvent this.
Keep in mind that the GWX system tray icon may not immediately disappear from your system tray, instead continuing to reside there and even offering to help you with the upgrade if you click on it. We discovered however that it did indeed go away after a simple restart.
You can also click the “Remove Win10 Files” button to remove the upgrade files from your system, which should free up some hard drive space. However, according to Gibson, Windows will remove these files automatically eventually anyway, so it doesn’t really matter if you remove them now or let Windows do it later.
There are a couple of instances where you might see a different outcome. If you try to run Never10 on a system other than Windows 7 or Windows 8.1, it will inform you that it is intended only for those two systems since they are the targets of Microsoft’s upgrade path.
Also, if you try to run Never10 on a system that doesn’t have the latest GWX files, Never10 won’t work, but will offer to download those files so it can properly do its job. This seems counterintuitive, but due to the way Never10 works, it makes sense. It doesn’t actually remove GWX completely: it just prevents it from ever running, using Microsoft’s built-in hidden settings for doing so.
There is another program, called GWX Control Panel, that performs a similar function–and we recommended it when we originally wrote this article. If you really hate GWX and want to remove every trace of it from your system, GWX Control Panel will allow you to do so. It’s a bit more complex than Never10, and its extra features aren’t necessary for most users. However, if you’re tech savvy, and you want full control over the entire process, GWX Control Panel is another option.
screenshot.1
For the vast majority of users, however, Never10 is all you need.

Before we wind things up, we need to reiterate that we do believe that if you’re using any recent version of Windows (7 or 8.1), or you’ve held off and are still using Vista or even XP, that this is the time to finally take the plunge. Windows 10 is a worthy upgrade and probably an unqualified success at retaining the spirit of Windows 7 while correcting the ills of Windows 8.1.
That said, installing a separate application as a recommended update is a sneaky way to go about ensuring user adoption. Add to that the fact that there’s no simple way to disable the GWX.exe application other than removing its autostart line from the Task Scheduler or uninstalling it through Windows Update, and we’re further puzzled at Microsoft’s reasoning and lack of transparency.
In the end, whether you feel this update process is helpful or whether you can make your way to upgrading to Windows 10 all by yourself will simply depend on how you’re used to doing things.
Others may choose to do a clean install and for that, updating through an existing Windows install won’t even apply.
How to Adjust the Click Speed of Your iPhone or iPad’s Home Button

ihb_top

iOS makes smart use of the Home button. You can double-click to switch apps, and even triple-click to do all sorts of things. The speed at which you need to click the Home button to register a double- or triple-click is fine for many people, but if you find yourself struggling to click the button fast enough, you can slow things down a bit.
To get started, fire up your Settings app and tap General.
ihb_1
On the General settings page, tap Accessibility.
ihb_2
On the Accessibility page, scroll down near the bottom of the list of settings and tap “Home Button.”
ihb_3
You have three options for your Home button click speed: Default, Slow, and Slowest. Slower speeds allow more time in between clicks when you’re double- or triple-clicking the Home button. When you make a selection, your device will vibrate three times to show you the speed required for multiple clicks. Choose the one that works the best for you and exit the Settings app.
ihb_4
And there you have it! It’s a simple change if you know it’s available and where to find it, but changing the click speed for your Home button can make a big difference if, for whatever reason, you’re not able to click rapidly enough at the default speed.

Wednesday, June 1, 2016

Bypass and reset the password on any Mac
Locked out of your computer? There's no need to panic, all Macs include a built-in password reset utility.

You may start to freak out if you ever forget the password to log into your iMac or MacBook , but it's really not that big of a deal. All Macs include a built-in password reset tool that is incredibly easy to use.
To get started, you will need to restart your computer. Press the Command and R keys at the same time when the grey screen appears and hold them until you see the Apple logo. A small loading bar will appear under the logo. Sit tight as your system boots into Recovery Mode.

Click the Utilities tab in the top menu bar, select Terminal, type resetpassword and press Enter. Close out the Terminal window and behind it you will find the Reset Password utility.

All you have to do now is select the user account you want to reset, enter a new password or leave it blank and click Save. Then just simply restart the computer from the Apple menu and login with your new password. It's as easy as that.


This method is very useful if you ever forget your password or if you need to get into a child's password protected computer!

Friday, May 13, 2016

WhatsApp Now Available On PC and MAC
WhatsApp has definitely Upgraded their Platform by Introducing and Extending their Software to PC/Computer Users/MAC Users.


Though in the past we've had numerous trials/posts on how to use whatsapp on pc via AMIDuOS Emulator.,BlueStacks and the rest of them. But non of them was enough and not everybody has opportunities to have this.

But Few days Ago, I got some tips from folks saying WhatsApp is now working directly with PC without using Third-Party Soft-wares. I was very happy when i heard about this new Improvement from WhatsApp


HOW TO DOWNLOAD WHATSAPP DIRECTLY TO YOUR PC

Download for Windows (32-bit)


Download for Windows (64-bit)

Not on Windows? This is for Mac OS Users Download for Mac OS X 10.9 and higher 


ENJOY GUYS!!!

Wednesday, May 4, 2016

Run Android Apps on Your PC via AMIDuOS
Yes Guys, I've got a New Emulator making mad Sense more than some Emulators we have around.

How did i came about this Emulator? I was actually surfing the net looking for a new and Easy Emulators unlike Bluestacks and the rest of them and i managed to stumble on this one via their webpage.

I downloaded it and now Flexing with it, Its not only Easy to Use,It also has some Great Feature that i Know y'all gonna Love. Withou much gist, lets get into it!

AMIDuOS comes pre-installed with stock Android apps and the Amazon App Store. The Google Play Store can be installed for access to popular Google apps like Gmail and Google+ using the AMIDuOS updater.


To Install the Google Play Store, follow these steps:
  1. After you have installed AMIDuOS on your Windows 7/8/8.1 system, launch AMIDuOS from the desktop shortcut or Start menu in Windows
  2. Download the gapps package from below links.
  3. After the download is complete, open the Downloads folder in your system/browser and Right Click on the downloaded zip file and then click “Apply to AMIDuOS” to launch the update.
  4. The zip file package will now update AMIDuOS, enabling you to enjoy Google and third party apps available through the Google Play Store.
*All Google apps need to be installed again when you upgrade the AMIDuOS [Follow the above steps].
*This is a third-party website, not hosted or maintained by American Megatrends, Inc.

Sharing between Android and Windows

img

AMIDuOS provides a great feature to share data between Android and Windows. By default, users Music, Videos, Pictures, Documents folders are shared between Android and Windows; The contents in this folders will be available in Android.

Configure Shared Folders:
The AMIDuOS Configuration Tool can be used to select the folder which you want to share.
Follow the below steps to configure the folder.
  1. Go to Setting → AMIDuOS Configuration Tools → AMIDuOS Configuration Tools.
  2. Click Edit option along with any shared folder.
  3. Change the shared folder location and save it.
    and reboot your AMIDuOS to get the changes reflected
AMIDuOS Shortcuts
AMIDuOS supports keyboards shortcuts which can be used in desktop or laptops

List of Keyboard Shortcuts:
  • Alt+Ctrl+R - Rotate AMIDuOS
  • Alt+Ctrl+Z - Zoom AMIDuOS
  • Alt+Ctrl+T - Enable/Disable Gesture Support
    • Up arrow - Swipe up
    • Down arrow - Swipe down
    • Left arrow - Swipe left
    • Right arrow - Swipe right
    • w - Tilt up
    • s - Tilt down
    • a - Tilt left
    • d - Tilt right
    • delete - Tap
img

Enable Root Mode

img

AMIDuOS supports root mode. Booting in root mode allows to use AMIDuOS as super user.

Following are the advantages of root mode:
  • Ability to install apps that require root privileges.
  • Access to system and data partition.
  • Adb running with super user permissions.
Enable Root Mode:
You can enable it by AMIDuOS Configuration tool.
Follow below instruction to enable root mode for AMIDuOS.
  1. Go to Setting → AMIDuOS Configuration Tools → AMIDuOS Configuration Tools.
  2. Open AMIDuOS Configuration Tool and enable the RootMode.
  3. Click on apply save it and reboot your AMIDuOS.
On Point right? Having anything to add or Complains, please Share with Us!


CreditsAMIDuOS


NG-[C:G.Comp,B:Allbrand,Wk:1716,Dim:300X250]:Tablets


FIXED: Windows 10 Start Menu and Modern Apps Not Working
Good Morning TUB Readers, I know its been a while i Posted Tutorials Connected to Computer/PC Related Issues. So here's One of them. I know some of you guys must have come across this one way or another and you must have gotten Solutions. Now this Tutorial is for the Readers that hasn't still gotten any solution to this Same Issue.

So, lets Kick Off. Recently, I installed Windows 10 OS on My HP Note Book Laptop. I was Enjoying it for a while and suddenly the Start Menu refuses to Open as well as Cortana, some of the apps on the task bar, battery notification not lunching and so on. Well, if you ask Me, I'll say its one of these few Bugs Windows 10 has.

So I searched the web,watched Videos on how to Fix this Problem and I Successfully got a Fix to this Bug. So If you are currently experiencing this same problem, you've come to the right place.


Now some of the logistics am going show you in this Tutorial is gonna be a sure way on how to fix this problem. All you have to do is to follow the Necessary Instructions, get it Done and get your PC fixed and Surfing on Windows 10 without anymore Bugs.
    • First Method: Delete Corrupted AppLocker Files
                I found the fix:
      1. Right-click at Start and run Command Prompt as Admin
      2. Type command:
        ren %windir%\System32\AppLocker\Plugin*.* *.bak
      3. Restart Windows
      • Second Method: Start APPLICATION IDENTITY Service
                 Another fix for the The Start Menu Does Not Work problem is:
      1. Right-click at Start and click RUN
      2. type SERVICES.MSC and press the enter key
      3. right click on APPLICATION IDENTITY and select START
      4. A reboot is not required...............ENJOY!!!
      •  Third Method: Use DISM Command
                 A third fix I have used successfully is:
      1. Create a new user and log into it
      2. Right click on the START button and select COMMAND PROMPT (RUN AS ADMINSTRATOR)
      3. Type dism /online /cleanup-image /restorehealth
      4. Restart the PC
      5. Log back into the problematic profile hopefully you’ll find the store and apps work again
      • Forth Method: Power-Shell Command To Re-register Packages
                 A forth fix I found came directly from Microsoft Partner support:
      1. Press Windows Key + R on your keyboard.
      2. Key in PowerShell and hit Enter.
      3. Right click on the PowerShell icon on the taskbar and select Run as Administrator.
      4. Now paste the following command in the Administrator: Windows PowerShell window and press Enter key:
        Get-AppXPackage -AllUsers | Foreach {Add-AppxPackage -DisableDevelopmentMode -Register “$($_.InstallLocation)\AppXManifest.xml”}
      5. Wait for PowerShell to execute and complete the command. Ignore the few errors (in red color) that may pop up.
      6. When it finishes, try hitting Start and hopefully it’ll start working. This is My Best Bet!
      • Fifth Method: Create New Profiles & Copy the TileDataLayer DataBase (two different steps)
             STEP 1 =>> To Create New Profiles 

      1. Login to windows (in your normal and broken Windows profile)
      2. Right-click the Start button, then Command Prompt (Admin)
        • If that fails try Press WINDOWS key + X Key and select Command Prompt (Admin)
      3. Enter the following commands (one at a time and press ENTER after each one) in the Command Prompt window
        .
        net user TempAdmin1 “password1” /add
        net user TempAdmin2″“password2” /add
        net localgroup administrators “TempAdmin2” /add
        .
      4. Sign out (you can try CNTL+ALT+DEL and select SIGN OUT if you are stuck)
                STEP 2 =>> Copy the TileDataLayer DataBase

      1. Login to the TempAdmin1 account using password password1
      2. Logout (do not SWITCH USERS)
      3. Login to the TempAdmin2 account, using password2
      4. Click START and select File Explorer, click the VIEW tab (at the top of the screen), then check on Hidden Items
      5. Double click your way to  C:\Users\TempAdmin1\AppData\Local\TileDataLayer
        • Click CONTINUE when you see the security prompt
      6. Right-click the folder DATABASE and select COPY from the context menu
      7. Double click your way to (C:\Users\<YOUR USERNAME>\AppData\Local\TileDataLayer)
      8. Right-click the DATABASE folder and Rename to DATABASE.DelMe
      9. Right-click on an blank area in that folder, and select PASTE
      10. Reboot your Windows 10 PC and then sign into the user that had the problem
                If your Windows 10 Start Button is working, you are done, otherwise proceed to the Last Method below.
      •  Sixth Method: Run a REFRESH Process
                If you have had enough, you can just give up and REFRESH you machine.
      1. Right click on the START button
      2. Hold the shift key while selecting RESTART
      3. Select TROUBLESHOOT from the recovery menu
      4. Select REFRESH YOUR PC
      NOTE: This will reinstall Windows 10 but it will keep all of your files (Documents, Pictures…) but it will kill all of the programs that have been installed.  Everything that is dead will be in C:\WINDOWS.OLD so you can fish out anything that is missing, but you will have to reinstall your programs, like Microsoft Office.
      You can also see a Little Video on One of the Above Methods


      Hope One of this Methods Solved your Windows 10 Start Button Issues. If so Comment/Share this Post to your Favorite Social Community by Clicking any of the Share Buttons Above. But if not, Post your Comments to lay your Complains. 


      ENJOY!!!!!!!!!!!!!!!!!!


        Tuesday, April 26, 2016

        How To Use Airtel 3GB For N1000 BIS Plan On Android And PC
        Good Day friends, I'm here with tips on how to subscribe to Airtel 3GB blackberry plan and use it on any android phone.

        The 3GB subscription is for BB10 users but with this airtel cheat you will be able to use it on your android.


        Items required;

        BB10 IMEI ( I will provide it for you)
        N1000 To Activate the 3GB BB10 Plan
        How To Tweak Imei of android device

        If you don't know how to tweak imei please follow this link ==> How to tweak imei of android phones

        If you know how to tweak imei, you will have to tweak this imei ==> 356760051192452
        Change the last five digits and tweak your imei.

        After you have successfully tweaked the imei, move on to the next step to subscribe for the airtel data plan for android

        How to activate the Airtel blackberry plan of 3GB for N1000

        Dial this code *431# to subscribe to airtel blackberry data plan of 3GB

        Configure your phone APN to internet.ng.airtel.com

        To check your airtel data balance, dial *140#

        NOTE: You can also use it on pc when you connect your phone to your PC with hotspot or pdanet+

        Saturday, February 20, 2016

        How to Stream YouTube Videos without Buffering
        In this tutorial, I’ll be your guide on how to watch YouTube videos faster using either your Chrome browser or Mozilla firefox.

        1.       Firstly, download the Smartvideo YouTube extension for Chrome browser or Mozilla firefox, and include the extension to your chrome browser or add to your Mozilla firefox browser. If you’re a firefox user, the setup is automated, so you’ll start streaming video with best streaming quality, for chrome users, follow below procedures.


        2.       Once you’re done with the chrome installation. Simply go to YouTube and enter the any video you wish to play, and then navigate your mouse cursor in between videos, you should see a small rectangular box that will be popped below the video.


        3.       On the box, make sure that the “smart buffer” box is checked; you can also go to Global preference and tweak the settings to your taste.


        4.       That’s it. You can continue your video with high quality streaming level.

        That’s it on how to Play YouTube video without buffering… if you got any question, or related issue please do let us know via comment section.

        Saturday, February 6, 2016

        6 Best WiFi Hotspot Software to Replace Connectify

        There are times when we want to share a wired internet connection to others through our Windows PC and this is when we need a capable WiFi hotspot software. Thankfully, we have Connectify for Windows, which is so much more than being a simple internet sharing software. While it shares your internet connection flawlessly and securely, it also brings so many advanced features like File sharing, Bridge, Dispatch and more, which are unmatched by its competitors. But like every other software or tool, it comes with its share of problems and those problems can make us look for an alternative.

        Why we need a Connectify alternative?

        Connectify is a very feature rich software and there’s no doubt it’s the best WiFi hotspot application but as we mentioned, there are a few issues. While Connectify comes in a free “Lite” version, it is very limited and the paid versions dubbed Connectify PRO and MAX respectively start at $35 and $50 respectively, which might be a bit steep for some.
        Another issue is using Connectify can be a little complicated at times due to the great number of features built right into it. We love some of its alternatives due to the simple reason that they are way easier to use. If you want advanced features, there’s no match for Connectify but if you are looking for a simple WiFi hotspot software, then you should look at some of the great Connectify alternatives for Windows we have found.

        Best Connectify Alternatives to Share Your Internet

        OSToto Hotspot (Free)

        OSToto Hotspot

        You must be aware of OSToto Hotspot (Yes, we don’t like the name either!) from its older name 160WiFi. While the name has changed, it remains a great WiFi hotspot software. It comes with a simple interface, which lets you start your WiFi hotspot with a single click. The software shares a secure internet connection, thanks to its usage of standard WPA2 PSK password security. Other features include ability to blacklist devices, set time when you want the hotspot to turn off, allow hotspot to run even when you hibernate the PC and more. The best thing about OSToto Hostpot is it’s totally free and there are no ads either.

        Download OSToto Hotspot (Free)


        Compatibility: Windows 10, 8.1, 8, 7, XP, Vista.

        Baidu WiFi Hotspot (Free)

        Baidu WiFi Hotspot

        Baidu WiFi Hotspot software is another great Connectify alternative, as it has a great mix of simple and advanced features. The good thing is the advanced features never hinder the experience here, unlike Connectify. Apart from sharing your internet connection quickly, the software also lets you send and receive files from a device that’s connected to the WiFi hotspot, which is a pretty handy feature. Baidu WiFi Hotspot is fast, smooth and it’s also free.

        Download Baidu WiFi Hotspot (Free)

        Compatibility: Windows 10, 8.1, 8, 7, Vista, XP.

        Thinix WiFi Hotspot (Paid)

        Thinix WiFi Hotspot

        Thinix WiFi Hotspot software is a great internet sharing software, which along with simple internet sharing brings a few cool intuitive features. As with any other WiFi hotspot software, it lets you configure the hotspot the way you want. Along with that, you can prioritize devices, so if a device of yours is streaming a video, you can give it a higher priority in the settings, so that there are no hiccups in playback. Thinix offers you a free trial for a week in which you can use the hotspot for 15 minutes every day. For unlimited usage, you can get the paid version for $12.95. Even though Thinix’s official website says the software only supports Windows 7 and 8, we tested the app on Windows 10 and it works fine.

        Download Thinix WiFi Hotspot (Free trial for a week/ Paid version starts at $12.95)

        Compatibility: Windows 10, 8, 7.

        Virtual Router Plus (Free)

        Virtual Router Plus

        Virtual Router Plus has been a popular WiFi hotspot software for quite a while now and even though the developers don’t seem to be actively updating the app anymore, it still gets the job done. It is the most simple WiFi hotspot app you will ever come across. The software has no additional features and it’s not really a bad thing as long as you only want the WiFi hotspot feature. You can configure the name and password of the hotspot and you can start or stop it, that’s it. Virtual Router Plus should be fine with a lot of people, who only want a stable WiFi hotspot software. While the Virtual Router Plus website says it only supports Windows 7 and 8, we tested it on Windows 10 and it works as it’s supposed to, so no worries there.

        Download Virtual Router Plus (Free)

        Compatibility: Windows 10,8, 7.

        LionScripts WiFi Hotspot Creator (Free)

        LionScripts WiFi Hotspot Creator

        LionScripts WiFi Hotspot Creator is also a very simple WiFi hotspot enabling software. The software comes in two versions. One is a free version with ads and other is a paid version, without ads. As we mentioned, the software is pretty simple with only options to configure the name and password of the WiFi hotspot. There are also options to start hotspot with or without opening the software. Just like other hotspot softwares, the website shows support for Windows 8, 7, Vista and XP but we ran it on Windows 10 and it runs fine.

        Download LionScripts WiFi Hotspot Creator (Free version/ Ad-free Paid version $11)

        Compatibility: Windows 10,8, 7, Vista and XP.

        MyPublicWiFi (Free)

        MyPublicWiFi

        MyPublicWiFi is one of the oldest WiFi hotspot softwares around and not much has changed in the software but it still works. While the software does share your internet with ease, it also brings some cool advanced features that might come handy. The software lets you block any user’s access and it also allows you to block features like file sharing over WiFi, which might eat up your bandwidth. MyPublicWiFi also features a URL logging feature, which as the name suggests logs all the websites visited from your WiFi hotspot. Overall, MyPublicWiFi continues to be a great WiFi hotspot software and it remains free to use.

        Download MyPublicWiFi (Free)

        Compatibility: Windows 10, 8, 7, Server 2008.

        Bonus: Windows 10’s WiFi Sense Feature

        wifi-sense

        Windows 10 has introduced several new features and some of them aren’t really well known, one of them is WiFi Sense. WiFi Sense is hidden away in Windows 10’s Settings->Network & Internet->WiFi->Manage WiFi Settings. It lets you share your WiFi network to your contacts (Outlook, Skype or Facebook) without sharing the network’s password. It’s a fast, secure way if you want to share your WiFi to your friends and family. It’s important to note here that people with only Windows 10 or Windows Phone devices will be able to connect through WiFi Sense.

        These are the best Connectify alternatives available and they all support the latest Windows version, that is Windows 10. So, you should definitely give them a try and let us know which WiFi hotspot software you liked the most.